Rangecast FAQ
[FAQ-1096] Add a view to a HTML5 world
Page Type: REFERENCE
OVERVIEWViews provide a fast way for users to select a predefined set of channels in the Rangecast player, to narrow the (possibly large) list of all available channels to a smaller group that is relevant to a particular community or bureau. Views can be added to worlds through the Editor interface in the Rangecast player.
METHODNote: the colors shown in the screenshots may differ from what you see on your screen, depending on the color theme selected in your player.
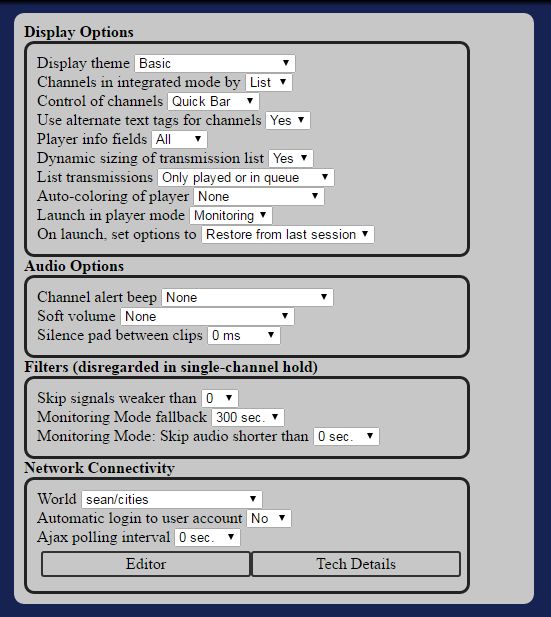
1. In the Rangecast player, go to the Options tab, and press Editor. This will enter a mode where you may create views for your world.
2. Select a view that includes all the channels that you want to use in your new view. The automatic "All Channels" view is an obvious choice, but if another existing view has a smaller set of channels, that may be easier to work with

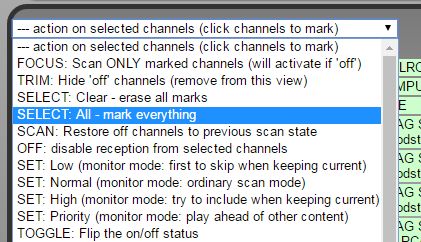
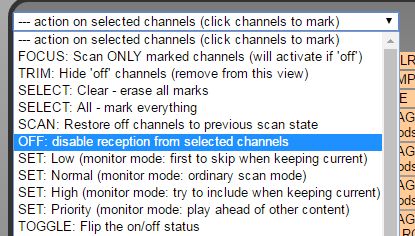
3. Mark all the channels, and then turn them off. This will give you a clean starting slate for choosing the specific channels you will want to receive. To execute this step, first select (mark)all the channels, then turn the marked channels off.
4. Mark the channels that you want to receive. You can mark individual channels, or entire groups or systems, by clicking on specific fields in the text tags. Continue until you have selected all the channels that you want in the new view.
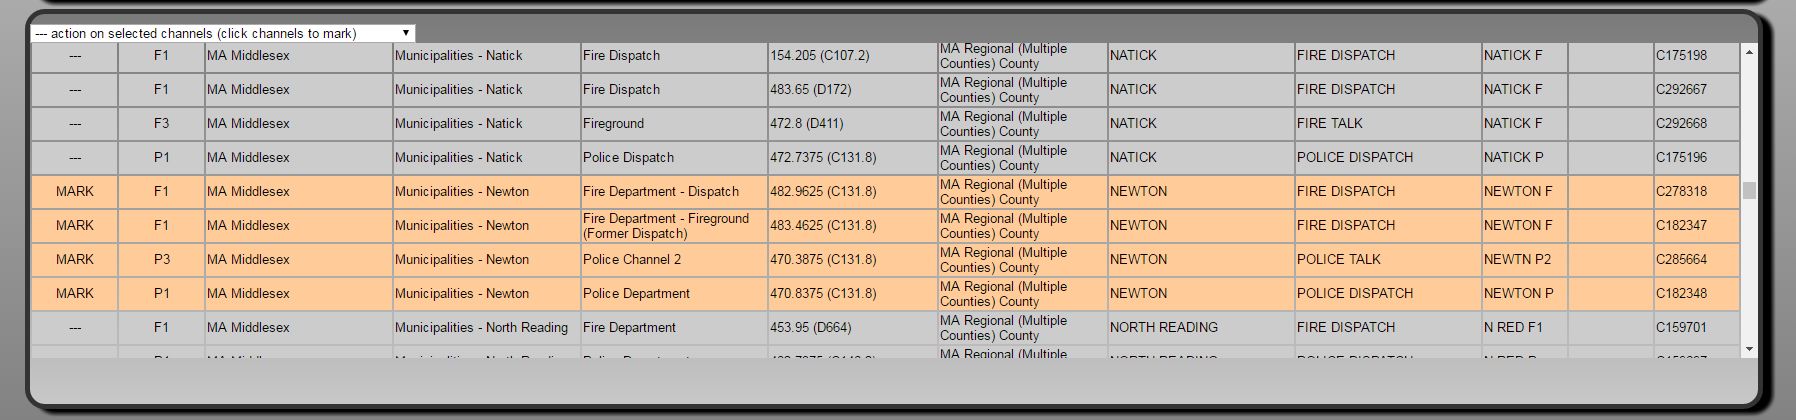
Note: Clicks toggle marking. You can remove a marked channel or group from the selection by clicking on the channel or group name. For example, if you want all the channels in a group except for two specific channels to exclude, you can initially mark the entire group by clicking on the group name, and then exclude those two individual channels by clicking on their channel names.
Note: In many cities, all of the channels are organized into a single group bearing the name of the city. To choose all of these channels, a single click on the group name is sufficient.
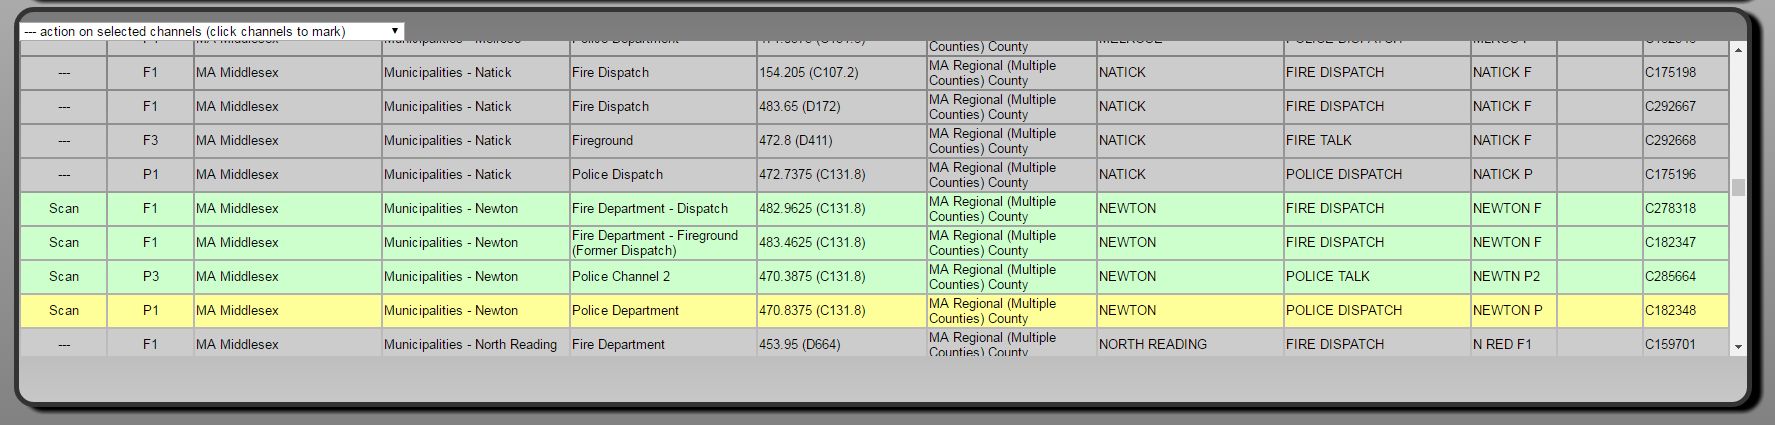
5. Focus on marked channels.
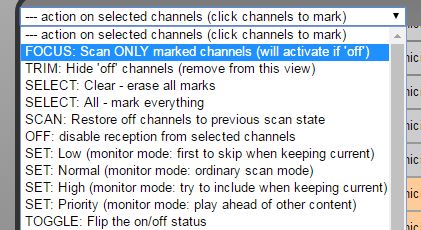
This will select the marked channels for reception, and ensure that all other channels are turned off.
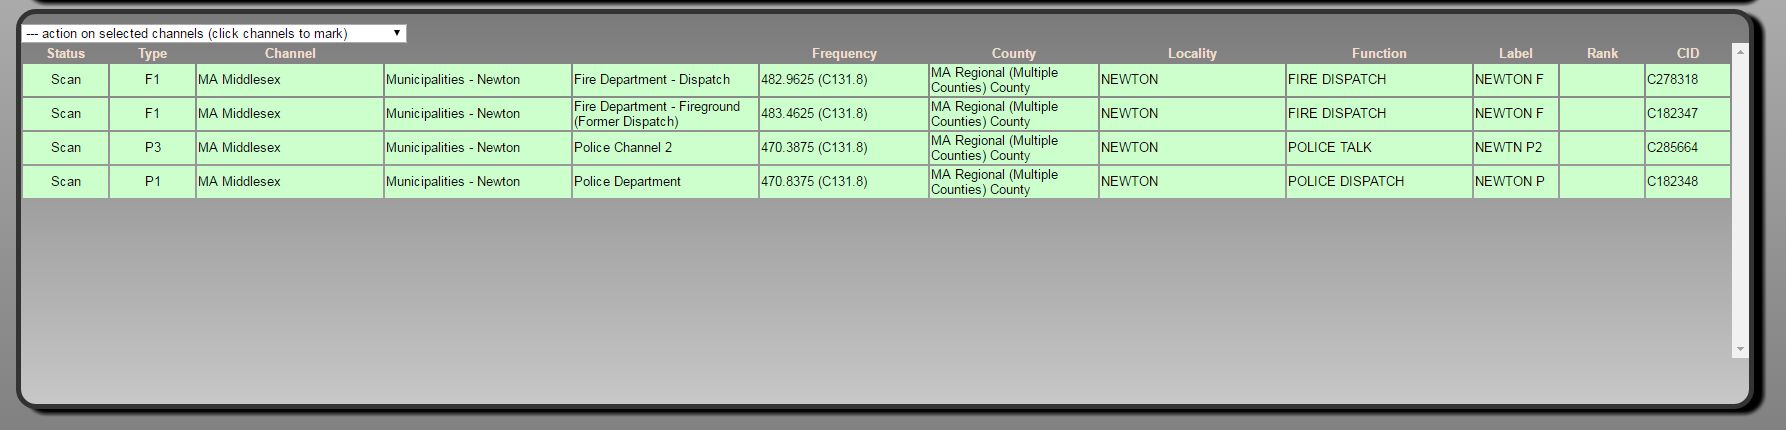
6. Trim the selection.
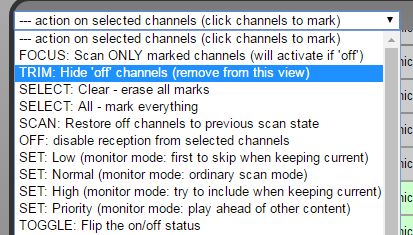
This will remove the "off" channels from the view.
7. In the controls at the top of the page, select "Save View"

After choosing this option, a text box will appear where you can enter a name for this view (note: the default name is 'new'; replace this text with your chosen name)
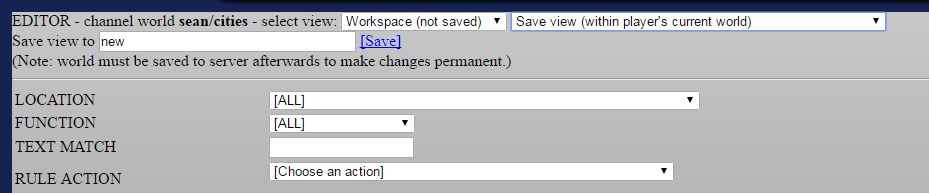
8. Enter your name of the view.
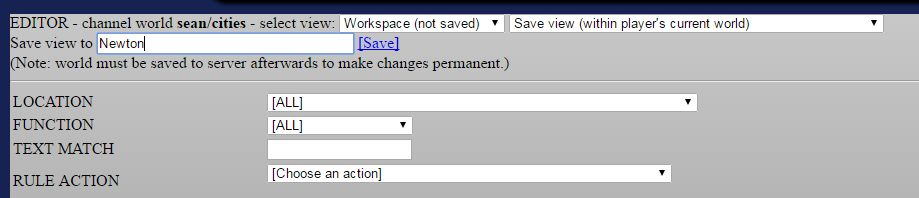
9. Press Save.

Note: The 'save' action here only saves the view into your active Rangecast player within the web browser (so you can see the view in action and verify the results), it does NOT permanently save the view. Your new view will be lost if you exit the browser at this time. To permanently save the view, you must save the world containing the view. This is described below.
10. If you want to create additional views, go to step 2, and repeat the process for each view.
11. (Optional) Select a tab (such as Best Fit) to return to normal player operations. You will see your view in action.

12. Important: To make your changes permanent, you must choose Save World on the Edtior page before closing the Rangecast player.
EXPECTED PROBLEMSYou can only modify an existing world, and save it to the same name (so the changes will be permanent for anyone in the future accessing the existing world) if you have ownership of that world. Although any Rangecast user may load a world (and access the audio content if they have the necessary access permissions), only the owner of a world is allowed to make permanent changes to that world.
If you do not have ownership of the original world, you may save a modified copy under your own Rangecast user account. The modified world will then have a new name, and any Rangecast user (you or others) may then access your modified world by loading it from your account.
CITATIONSREFERENCE
INDEX
Images shown - [block]